Source: Microsoft just brought back its best deal ever
![]()

The subject that fan boys of each side love to argue about. Mac malware. The fact is that malware for Mac is real and it continues to grow as a problem. In…read more
Source: History of Mac Malware – Webroot Threat Blog
![]()

Click here to learn more…
![]()
What would happen if Russia cut U.S. undersea telecom cables, as a New York Times report suggests? It may require a massive, hyper-organized operation to hurt Americans’ access to the Internet.
Source: What Would It Take To Cut U.S. Data Cables And Halt Internet Access?
![]()
Are you interested in the idea of a Chromebook but unwilling to take the plunge? With ChromeReady, you can test out the OS on an old system to see what all the fuss is about. It’s a great tool for anyone who’s thinking about purchasing a Chromebook but wants to take it for a test drive ahead of time. However, it’s also a rather interesting diversion for the user who’s simply curious about the world beyond Mac OS X and Windows 10. The process is simpler than installing something like Linux, but by the end of it you’ll have a system quite different to the one that you started out. Who knows — you might end up broadening your horizons a little bit. Getting Started First, you’re going to need to gather your materials — a couple of pieces of hardware and a couple of pieces of software. You should also be aware that if you’re going to install CloudReady rather than just run it from a USB stick, it’s going to completely wipe everything on your computer. CloudReady is a full OS, and that means that it needs a blank canvas to be installed upon. For that reason, it’s best to use an old PC if you’re just looking for a test drive, to ensure that you don’t love important content on your primary system. As of the time of writing, dual booting is not supported. You can only run the CloudReady version of ChromeOS alongside another operating system by installing each on entirely separate hard drives and choosing which to boot to through the system UEFI/BIOS. In theory, you might be able to install to a virtual drive from within another OS, but we’ve yet to try that option. Related: Google’s OnHub router is actually a Chromebook in disguise Once you’ve considered the dangers of the process, grab an 8GB or 16GB memory stick and head to the CloudReady website. There, you’ll be able to download the correct install package for the type of system and OS that you’re running at the moment — make sure you make note of where the downloaded .bin or .bin.zip file lands on your hard drive. Next, download Google’s Chrome recovery tool from the Chrome Web Store. Once it’s downloaded, launch it directly from the same page to ensure it installed correctly, and you have everything that you’ll need to create the CloudReady installer for your system. Creating an Installer From the Chrome Recovery App, use the cog icon in the top right corner to access the settings menu and select Use local image. Navigate to the location of the package we downloaded from the CloudReady site earlier and select that file. The app should ask you if you’re ready to clear the contents of your USB stick, if you haven’t done so already (it most format the disk, and that means deleting everything on it). With that done, it should be ready to start creating your recovery image, leaving you with an installer that you can use to run CloudReady. One formatted and installed with Chrome OS the disk won’t be able to hold additional data compatible with Windows or OS X until it’s formatted once more, so we recommend using a drive that you don’t need for other purposes. However, to use that installer, you’re going to need to enable USB Boot on your computer. The method will change depending on your system. On older systems, you should be able to select the USB drive as a boot drive easily through the UEFI/BIOS. Newer systems with Secure Boot enabled may require that you turn the feature off. Systems that don’t let the user remove Secure Boot won’t be able to use CloudReady. Once that’s done, make sure your flash drive is inserted into an appropriate port and boot the installer from USB. You’ll now be able to use CloudReady from your USB stick, or alternatively begin the installation process if you want to make things more permanent. This will wipe all data currently on your computer, so think carefully about whether or not you really want to do so before taking the plunge. The next steps are relatively straightforward — just follow the wizard. But it’s well worth keeping a close eye on all stages of the install process so you know exactly what you’re doing to your system. Once you’re done, you’ll have the closest thing to a ChromeBook that isn’t actually a ChromeBook. Pitfalls to Avoid For the most part, CloudReady is an easily installed OS — but whenever you tinker with a device’s operating system, there are things that can go wrong. Make sure that you’re clear on the method of installation ahead of time, and understand that accidents can happen. If you’re wondering whether the old PC hanging around in your closet can run CloudReady, the answer is likely yes. Most hardware from the last eight years or so should be supported, but you can also refer to Neverware’s list of approved systems here. That said, we tried CloudReady on several systems, and found that it did not install on one (an Asus Transformer Book Flip TP200A). There’s no apparent reason why — so the fact your system should work doesn’t mean it will. Related: Discover your Chromebook’s hidden features with these 5
Source: How to turn an old laptop into a Chromebook
![]()
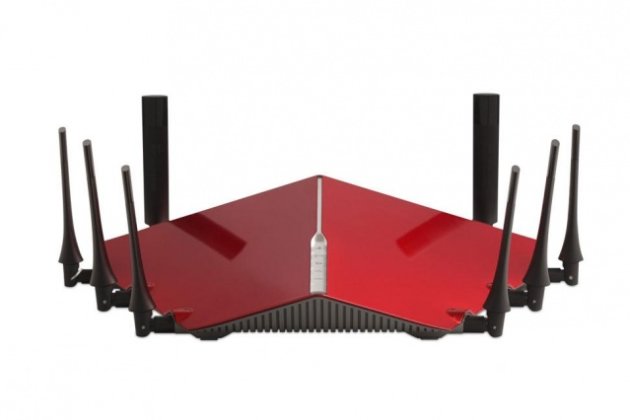
Does the term MU-MIMO ring any bells? If it doesn’t, it soon will. Ready or not, this new Wi-Fi standard update is set to revolutionize the wireless networking world forever. Let’s take a look at the technology and what makes it so cool for the average consumer. Sharing isn’t easy To get a proper understanding of how MU-MIMO works, let’s take a look at the way that a traditional wireless router handles data packets. Routers – probably including the one you use – are very good at sending and receiving data, but only in one direction. In other words, they can only talk to one device at a time. If you are getting video streamed onto your computer, your router cannot also be streaming online video gameplay to a console. “But wait,” you’re saying, “I can’t count the number of times that I’ve played video games while my SO watches Netflix on the laptop, so this is clearly wrong.” Yes, you can run multiple devices on your Wi-Fi network – otherwise, what would be the point? But older routers accomplish this by acting like a machine gun mounted to a merry-go-round. They rattle off bits of data very, very quickly to multiple devices in turn. Korn/Shutterstock Much like how film tape looks like a constantly moving image instead of a bunch of stills, accessing Wi-Fi feels like a constant connection to the Internet because the router switches between devices so quickly. However, it can only pay attention to one device at one time, which is one reason why Internet quality goes down if Wi-Fi bandwidth is too low. This works. It works so well that we rarely think about it. But the people who do think about it have long believed that it could work better. What if you could have a router that transmits data to multiple devices simultaneously? Wouldn’t it increase efficiency, be faster, and allow for more interesting network configurations? So advances like MU-MIMO were developed and eventually included into today’s wireless standards. These developments allow advanced wireless routers to communicate with several devices at once. A brief history: SU vs. MU Let’s talk about SU-MIMO vs. MU-MIMO. They sound like Pokémon, but are actually different ways to get routers to talk to multiple devices. SU-MIMO (single user, multiple input, multiple output) is older. The SU standard allowed routers to send and receive multiple streams of data at the same time, based on the number of antennas it had. Each antenna could handle a different device. Of course this required new lines of router with multiple antennas, but manufacturers had been looking for an excuse to stick some more knobs and points on their routers anyway. SU was included in the 802.11n standard update of 2007, and was slowly introduced in new product lines. However, SU-MIMO did have constraints in addition to antenna requirements. While multiple devices could be connected, they were still dealing with a wireless router that could only pay attention to one device at a time – our machine gun and merry-go-round analogy. Data speeds went up, interference became less of a problem, but there was still a lot of room for improvement. MU-MIMO (multiuser, multiple input, multiple output) is the standard that evolved out of work with SU-MIMO and SDMA (Space Division Multiple Access). Before you zone out on all these acronyms, we’ll cut to the chase and say that a lot of smart techies in universities and research labs created a way for routers to hold multiple conversations at the same time. With MU, the wireless router base station is able to communicate with multiple devices using a separate stream for each, as though each device has its own personal router. Read: TP-Link shows off new Archer C2600 router with MU-MIMO support Eventually MU became feasible enough to be added to an 802.11ac update in 2013. After a few years of product designing, manufacturers started incorporating the feature into their lines. Benefits of MU-MIMO CreativeCommons MU-MIMO is an exciting development because it has a noticeable impact on everyday Wi-Fi use without directly changing bandwidth or other key factors. It just makes networks much more efficient. When using this new standard, you don’t need multiple antennas porcupining out of your router, and have a more stable Wi-Fi connection for your laptop, phone, tablet, or computer. Every device can be spoiled child and avoid sharing its data stream with anyone else. This is particularly noticeable when streaming video or performing other demanding tasks. Your Internet speed feels faster and more dependable, although it’s really just smart networking at work. You may also be able to use more devices on your Wi-Fi at once, which is handy when friends come over to visit. MU-MIMO may be great, but it also has a couple limitations worth mentioning. Current standards support four devices, but add more than that and devices will have to share a stream, which brings us back toward SU-MIMO problems. It is primarily used in downstream communication, and is limite
Source: What is MU-MIMO?
![]()
Just remember… you get what you pay for.
Detect and eliminate viruses, get free protection for home users
Source: Avira Free Antivirus Review
![]()
For all my Linux using followers out there…Has administering Linux via the command line confounded you? Here are 10 GUI tools that might make your life as a Linux administrator much easier.
Source: 10 Linux GUI tools for sysadmins
![]()